Disclosure: As an Amazon Associate I earn from qualifying purchases. This page may contain affiliate links, which means I may receive a commission if you click a link and purchase something that I have recommended. There is no additional cost to you whatsoever.

Paper recycling may seem to be the form of factor greatest left to the recycling consultants, however do you know you may recycle your individual paper at residence with out an excessive amount of bother? You’ll be capable of get rid of some family waste — like unsolicited mail, used printer paper, or outdated newspaper — and create one thing distinctive and handmade on the identical time.

What You’ll Need
- Waste paper (virtually something will work — simply keep away from shiny paper like magazines)
- Water
- A blender or meals processor
- An outdated image body or wooden to make your individual body
- Mesh or display (along with the body, this can make your paper mould)
- Felt, material, or sponge
- An oblong bin or pan to carry water (it must be larger than your body)
- Decorations like dried flowers, confetti, or seeds (non-compulsory)
Plenty of directions exist on-line for easy methods to make your individual paper. Make Something presents a video tutorial and Instructables has written instructions with images. To offer you a normal sense of the method, we’ll summarize the way it works.

Main Steps
1. Tear the paper into small items and put right into a blender with heat water. Blend till the combination turns into a reasonably easy pulp. If you wish to add specks of colour, add items of coloured paper at this level, then mix only a bit.
2. Assemble your “mould.” Attach your display to your body utilizing duck tape, staples, or some other methodology that may maintain the display affixed to the body’s edges. You’ll use your second piece of display later within the course of.
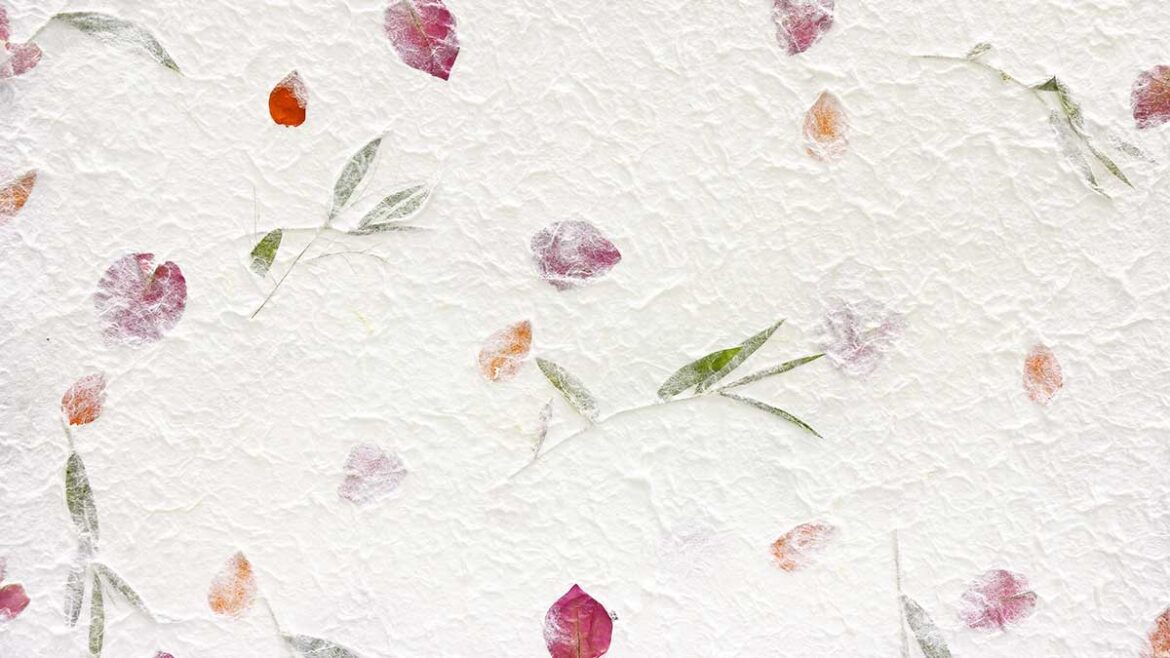
3. Put your mould in your bin or pan of water, then pour the pulp into the mould. (If you carry the mould up, the pulp ought to cowl the display.) At this level, you may add decorations like dried flowers or grass, a splash of paint, and even seeds to make plantable paper. Be positive so as to add a bit extra pulp to cowl the decorations in order that they adhere to the paper.
4. Lift the mould out of the water, and place the second piece of display on prime of the pulp. Use a material or sponge to press out extra water.
5. Lift the display and the paper ought to come proper up with it. Now invert the display on a towel (pulp facet down) and dab the sponge or material on the display facet to press out extra water.
6. Then carry the display off of the paper and set your paper on a towel to dry. You can air dry it, or cowl it with a paper towel and press it with an iron to hurry up the drying time.
Check these steps out in motion, courtesy of Storm the Castle:
[embedded content]
Want to know extra? Learn how paper gets recycled or go to paperrecycles.org.
Editor’s Note: Originally printed on March 8, 2015, this text was most just lately up to date in August 2024.